 Sanding curved surfaces can be a tricky task, even if you're experienced with sanding. It requires a different approach than sanding a flat surface. Doing it the right way helps you maintain the shape and achieve a smooth, even finish.
Since there are so many types of curved surfaces, choosing the right tool will depend on the specific material and type of curve you are working on. You might come across rounded furniture edges, intricate moldings, or even a curved guitar body. Each type of curved surface will require a different tool and technique.
This article goes over the best tools for sanding and shaping some of the different types of curved surfaces you may be working on. If you have any specific questions, our abrasives experts are just a phone call away to help out.
Why Curved Surfaces Need Specialized Tools
Maintaining the right contour by avoiding over-sanding or creating flat spots, and reaching tight spaces are just a few of the hurdles you might encounter.
It's easier to accidentally over-sand when working on a curved surface. This can wind up ruining the intended shape by flattening parts of what you are working on.
You also may come across tighter spaces, intricate details, and varying angles that make the whole process a lot more difficult. There is no one-size-fits-all tool that will get you the best finish on these different surfaces.
Tools like flexible sanding pads and contour sanding grips are designed to conform to the shape of a curve. Specialized sanding tools like spiral bands and carbide burrs will be useful for detailed and intricate projects. Then you have machines like surface conditioning tools and certain types of flap discs that can be used to sand and grind larger curved areas.
Best Tools for Hand Sanding Curved Surfaces
Sandpaper
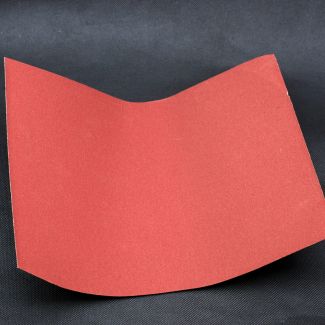 Used the right way, sandpaper sheets can be used for a lot of different curved sanding projects. It is flexible enough to contour to the shape you’re working on and can be used with or without extra tools.
What Curves Can Sandpaper Be Used For:
Sandpaper is indispensable for sanding curved surfaces. The variety of grits allows you to start with a coarse grit for shaping and move to finer grits for smoothing and finishing. Whether you're working on wood, metal, or plastic, sandpaper can adapt to the contours of the surface, making it a go-to tool for both broad curves and intricate details. Sandpaper can also be attached to sanding blocks and contour sanding grips for better results.
Tips for Sanding Curved Surfaces with Sandpaper:
- Manual Sanding: For delicate curves, hold the sandpaper in your hand and apply gentle pressure to avoid flattening the curve.
- Wrap Around Shapes: For consistent sanding, wrap the sandpaper around a cylindrical object that matches the curve you're working on.
- Work Through the Grits: Start with a lower grit to shape the curve and gradually move to higher grits for a smooth finish.
- Tear the Paper: For curved surfaces, tear sandpaper into smaller pieces for better control and to avoid wrinkles that can cause uneven sanding.
- Fold the Paper: Fold the sandpaper for more rigid edges when working on detailed curves.
Sanding Blocks
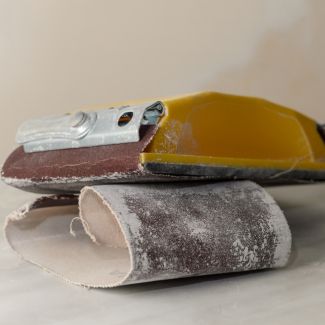 Sanding blocks are useful tools that help you keep even pressure against the surface you’re finishing. Sanding by hand can be risky since the pressure against the surface is centered on the points of contact, your fingers. This can leave uneven surfaces, while sanding blocks only press down on the face of the block. You can also quickly make a DIY sanding block by wrapping sandpaper around foam or a dense sponge.
What Curves Can Sanding Blocks Be Used For:
Sanding blocks are ideal for keeping consistent pressure across larger curves, helping to prevent uneven sanding and maintain the intended shape of the surface. They’re particularly useful for smoothing out rounded edges on furniture, trim, and other woodwork.
Tips for Sanding Curved Surfaces with Sanding Blocks:
- Choose the Right Shape: Use a rounded or contoured sanding block that matches the curve of your surface.
- Keep Even Pressure: Apply consistent pressure to avoid creating flat spots on the curve.
- Use Long Strokes: When sanding large curves, use long, smooth strokes to maintain an even finish.
Contour Sanding Grips
These hand tools are designed specifically for sanding curves. They are made from a flexible material, like rubber, with a contoured shape that conforms to the curves of your workpiece and an extended grip to make sanding easier. These come in all shapes and sizes that you can wrap your sandpaper around and use on intricate moldings, trim, and other decorative elements that have complex curves and profiles.
What Curves Can Contour Sanding Grips Be Used For:
These grips are particularly effective for sanding intricate moldings, trim, and other decorative elements that have complex curves and profiles. They ensure that the sandpaper follows the curve exactly, providing a consistent finish without distorting the shape.
Tips for Sanding Curved Surfaces with Contour Sanding Grips:
- Match the Grip to the Profile: Choose a grip that closely matches the profile of the curve you’re working on.
- Use Light Pressure: Let the tool do the work; pressing too hard can distort the surface.
- Sand in the Direction of the Curve: Always sand along the curve to maintain its natural shape.
- Wrap the Grip Properly: The sandpaper should be wrapped tightly around the contour grip to prevent slipping or wrinkling, which could lead to uneven sanding.
Flexible Sanding Sponges
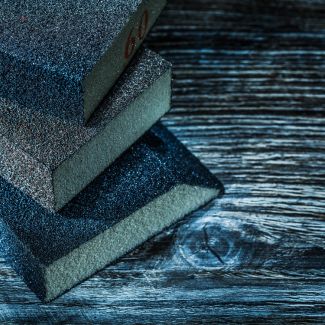 Flexible sanding pads are spongy, abrasive blocks that can bend and flex to match the contours of irregular surfaces. Instead of wrapping sandpaper around it like you would the last two tools mentioned, these have abrasive grains already on their surface. They are available in various grits and are perfect for sanding curves and detailed areas.
What It Can Be Used For:
Flexible sanding pads are excellent for sanding complex curves, such as those found on sculptures, automotive parts, and intricate furniture pieces. Their ability to conform to the surface ensures even sanding without flattening the curve.
Tips for Sanding Curved Surfaces with Flexible Sanding Pads:
- Work in Small Sections: For intricate curves, work in small sections to ensure you maintain control and precision.
- Rinse Often: If you're working with a wet/dry pad, rinse it often to prevent clogging and extend its life.
- Apply Even Pressure: Keep pressure consistent to avoid creating uneven spots on the curve.
Handheld Metal Files
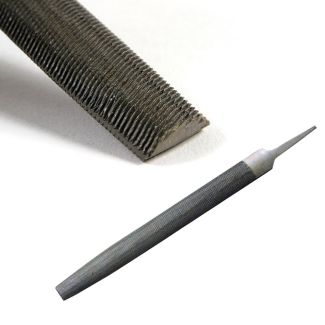 Metal hand files are narrow tools made of hardened steel. They feature “teeth” on one or both sides of the file that are used to remove material from various surfaces. There are several different types for metal files based on the cut grades, length, cross-section cut type (single vs double), and shape (flat, mill, round, and half-round).
What It Can Be Used For:
Metal files are ideal for refining small, tight curves and intricate details on harder materials like metal or wood. They offer precise control for removing material in hard-to-reach spots or smoothing out detailed areas that larger tools might miss.
Tips for Sanding Curved Surfaces with Handheld Metal Files:
- Match the File Shape to the Curve: Use round or half-round files for curved edges since these shapes will follow the contour better.
- Controlled Pressure and Movement: Apply light pressure and work with steady strokes to avoid gouging the material.
- File in one direction: File in a single direction, following the curve's contour. Avoid back-and-forth motions, which can create scratches.
- Clean the file regularly: Use a file card or brush to remove debris that can clog the teeth and reduce how effective it is.
- Choose the Right Grade: Select the right file grade (TPI) for the task. Coarser files (lower TPI) remove material quickly but leave a rougher finish, while finer files (higher TPI) provide a smoother finish.
Abrasives for Sanding Curves with Power Tools
Sanding Belts
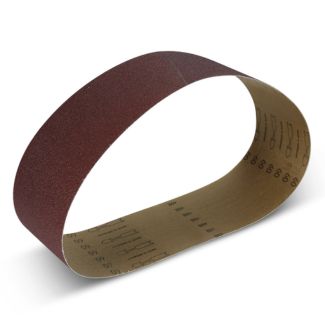 Sanding belts are continuous loops of sandpaper that are typically used with belt sanders for fast material removal. They are usually used on flat surfaces but can sand and grind curves with specialized tools and techniques.
What It Can Be Used For:
Sanding belts are excellent for smoothing or shaping large, curved surfaces, such as wooden dowels, pipes, or large furniture pieces with rounded edges. Tube sanders, a type of belt sander, are specifically designed for sanding cylindrical surfaces. You can also use a sanding belt manually by wrapping it around rounded surfaces and pulling it back and forth.
Tips for Sanding Curved Surfaces with Sanding Belts:
- Use a Tube Sander: For cylindrical shapes like pipes or wooden posts, tube sanders provide the best results.
- Wrap the Belt: If you're hand sanding, wrap the belt around the surface and use a back-and-forth motion to ensure even sanding.
- Choose the Right Grit: Start with a coarser grit for shaping and move to finer grits for finishing, especially on wood.
- Light Touch, Constant Motion: When using a belt sander on curves, apply light pressure and keep the sander moving continuously to avoid creating dips or flat spots on the surface.
Cross Pads
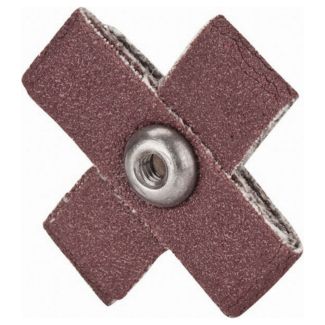 Cross pads are small, abrasive tools made up of abrasive flaps folded over one another in a t-shape/plus sign/cross shape. They attach to rotary or die grinders for precision sanding and finishing in small, tight spaces.
What They Can Be Used For:
The unique design of these abrasives makes them one of the best abrasive tools for grinding, polishing, and grinding inside of pipes, tubes, holes, and cylinders. They are also commonly used for restoring and refinishing curved metal components in automotive or machinery restoration.
Tips for Sanding Curved Surfaces with Cross Pads:
- Focus on Intricate Areas: Use these tools for detailed work where precision is key, such as tight corners or inside curves.
- Move in Small Strokes: When sanding curves, use controlled, small strokes to avoid removing too much material.
- Use Appropriate Speed: If attached to a rotary tool, adjust the speed to prevent the abrasive from overheating or cutting too aggressively.
- Maintain Proper Angle: Hold the cross pad at a consistent angle to the surface for even material removal.
Surface Conditioning Tools/Handheld Drum Sanders (e.g., Eastwood CONTOUR SCT®)
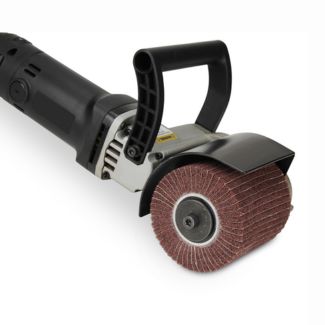 Surface conditioning tools (also known as linear grinder, handheld drum sander, and burnishing tool) are power tools that feature a rotating drum that can be fitted with a variety of abrasive drums. Depending on the type of drum, they can be used for aggressive or light material removal, polishing, and prepping surfaces for further finishing. For example, you can use drums with sanding bands for sanding or paint stripper drums for removing paint and rust.
What It Can Be Used For:
These tools are perfect for sanding larger curved surfaces like car body panels or rounded furniture. They offer even sanding while ensuring you don't flatten out the curve. Surface conditioning tools are also excellent for prepping metal surfaces for painting or coating. They are great for blending and feathering edges on curved surfaces, particularly in automotive body work.
Tips for Sanding Curved Surfaces with Surface Conditioning Tools:
- Choose the Right Drum Type: Use abrasive drums for aggressive sanding and non-woven drums for polishing or surface prep.
- Use a low speed: Start with a low speed and gradually increase it as needed. High speeds can generate heat and cause damage to the workpiece.
- Move Slowly and Steadily: Let the tool glide over the surface without applying too much pressure to prevent gouging or creating flat spots.
- Keep the tool moving: Move the tool continuously to avoid creating grooves or uneven spots on the curve.
- Use Overlapping Passes: When working on large curved surfaces, use overlapping passes to get an even coverage and avoid visible transition lines
Cartridge Rolls and Spiral Bands
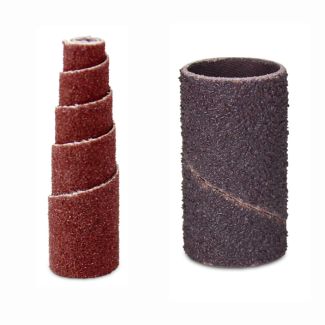 Cartridge rolls are tightly rolled strips of abrasive cloth that expose fresh layers of abrasives as each layer of cloth is worn down. Spiral bands are continuous loops of abrasive material wound in a spiral pattern. Both are designed to attach to rotary tools like die grinders or drills.
What It Can Be Used For:
These tools are ideal for sanding and shaping inside corners, curved edges, and hard-to-reach areas on metal or wood. They’re commonly used in metalworking and woodworking to smooth small, rounded surfaces or intricate designs. Spiral bands are particularly useful for sanding and finishing cylindrical or rounded surfaces, such as pipes, dowels, or small decorative woodwork.
Tips for Sanding Curved Surfaces with Cartridge Rolls and Spiral Bands:
- Choose the Right Size: Select a spiral band size that matches the curve you're working on for optimal results.
- Use Light Pressure: Let the rotary tool do the work; too much pressure can create flat spots or gouges.
- Work in Circular Motions: When working on cylindrical surfaces, use a smooth, circular motion to maintain an even finish.
Carbide Burrs
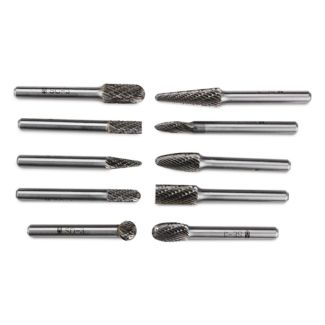 Carbide burrs are small, rotary cutting tools made from tungsten carbide, an extremely hard material. They are available with a variety of different shaped burr heads, such as ball, oval, and flame, with each shape designed for specific tasks. They are used more for grinding and shaping rather than sanding.
What They Can Be Used For:
Carbide burrs are perfect for intricate and precise work on tough materials like metal, wood, plastic, and even stone. Their small size and diverse shapes allow you to effortlessly shape and refine curves in wood, metal, and plastic, even in tight corners and hard-to-reach areas. Carbide burrs can be used for a wide range of applications, including shaping, smoothing, carving, and engraving
Tips for Sanding Curved Surfaces with Carbide Burrs:
- Match the Shape: Choose the burr shape that best matches the curve or detail you're working on, such as a ball burr for concave surfaces or a flame-shaped burr for tight corners.
- Use Light Pressure: Carbide burrs are aggressive, so apply light pressure to avoid removing too much material too quickly.
- Control the Speed: Use a rotary tool with adjustable speed for higher precision and to prevent overheating.
- Clean the Burr: Regularly clean the burr with a wire brush to remove buildup and maintain cutting efficiency.
Backing Pads with Foam Layers
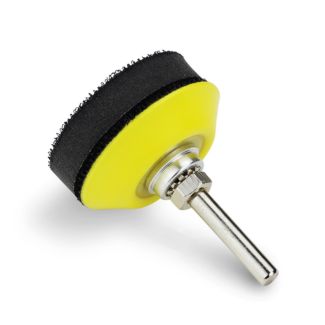 Backing pads with foam layers are hook-and-loop style pads designed for use with sanding discs. The foam layer provides flexibility and cushioning, making them better at working on contoured and curved surfaces than a typical flat backing pad.
What They Can Be Used For:
These pads are excellent for sanding and polishing curved surfaces where you need some flexibility to follow the contours without applying too much pressure. The foam helps absorb pressure, preventing gouging or creating flat spots. They’re commonly used with sanding discs for woodworking, automotive bodywork, and metal finishing.
Tips for Sanding Curved Surfaces with Backing Pads:
- Choose the Right Foam Thickness: Use a thicker foam layer for more extreme curves to help the pad conform better to the surface.
- Keep the Pad Moving: Avoid holding the pad in one spot for too long to prevent uneven sanding or burning.
- Combine with the Right Disc: Pair the foam pad with the right grit disc for your material and sanding stage (coarse for shaping, fine for finishing).
Flap Wheels (Mounted or Unmounted)
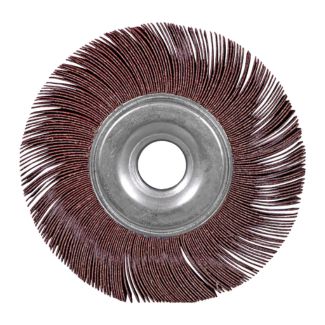 Flap wheels consist of multiple abrasive cloth flaps arranged in a circular pattern on a central hub. This design allows them to conform to curved surfaces while providing a consistent sanding action. They come in both mounted and unmounted varieties.
What They Can Be Used For:
Flap wheels are highly effective for sanding and finishing both internal and external curved surfaces. They're particularly useful for smoothing welds, removing rust or paint, and blending contours on metal, wood, and other materials.
Tips for Sanding Curved Surfaces with Flap Wheels:
- Choose the Right Grit: Start with a coarser grit for material removal, then switch to finer grits for smoothing and finishing.
- Use Light Pressure: Let the wheel do the work. Too much pressure can damage the surface or cause uneven sanding.
- Keep the Wheel Moving: To maintain an even finish, continuously move the flap wheel across the surface rather than focusing on one spot.
Less Common Abrasives for Curves, But They Have Their Place
While the tools mentioned above are ideal for sanding curved surfaces, there are a few others that, while less suitable, can still be useful in certain situations.
- Metal Wire Abrasives (Wheels, Cup, End, or Hand Held Wire Brushes): More for cleaning and surface preparation than sanding, wire brushes are useful for removing rust, paint, or corrosion from curved metal surfaces like pipes, handrails, or automotive parts.
- Nylon Wire Brushes (Wheel, Cup, or End): Similar to metal wire brushes but less abrasive, nylon wire brushes are ideal for cleaning and surface prep on softer materials or delicate surfaces where you want to avoid scratching.
- Grinding Wheels: Typically used for more aggressive material removal, grinding wheels can be useful for shaping or preparing large, tough curved surfaces, such as those found on automotive parts or metal fabrications. They're not typically used for fine finishing.
- Flap Discs: These versatile tools combine grinding and finishing in one step. They're especially useful on curved metal surfaces like automotive panels or sculptures, where they can smooth out welds or remove material while maintaining the curve. Note that T29 flap discs are better suited for contours than T27. (T27 vs T29 Flap Discs)
Wrapping it Up
Need help finding the perfect tools for your curved sanding project? Our experts are available to answer your questions and help you find the right tools for the job.
As a leading abrasive supplier, Empire Abrasives offers a vast selection of high-quality abrasives, including sanding belts, flap discs, and carbide burrs, to tackle any curve. Plus, with our fast shipping options, you'll have your order in hand and be ready to sand in no time!
