Whether you're refinishing furniture, cabinetry, or hardwood floors, the ultimate goal is to get a smooth, flawless finish that lasts. A perfect finish not only looks great, but can extend the durability of your woodworking projects. Raw wood can be challenging, due to its pores and inconsistencies that affect how the finish adheres to the wood’s surface.
Sanding sealer is base coating containing zinc stearate that is used before painting to seal wood pores. Using sanding sealer is a great option to quickly give you a smoother surface where your topcoats can adhere properly and achieve a stunning, consistent look.
In this guide, we'll go over what sanding sealers are, why sanding sealers are used, when you'd use sanding sealers, and how to get the best results with it.
What Does Sanding Sealer Do (and Why Use it)?"
These products have a range of benefits for all woodworkers, whether they are professionals and DIYers.
- Fills in Wood Pores: The sealer seeps into and fills its natural pores, almost like a microscopic spackle. Filling these pores creates a smooth, even base for the paint or stain to adhere to.
- Creates a Barrier: This barrier prevents excessive absorption of paint or stain into the wood, allowing these topcoats to sit on the surface evenly rather than soaking unevenly into the wood. This helps to achieve a more consistent color.
- Improves Adhesion: The smoother base enhances the adhesion of your paint or stain. This leads to less problems with shipping or peeling down the line.
- Makes Sanding Easier: Sanding sealer for wood reduces the amount of grain raising and minimizes the need for extra sanding.
What is Sanding Sealer Made Of? Composition and Types of Sanding Sealer
Sanding sealers consist of a diluted resin base (like lacquer, shellac, polyurethane, or varnish) combined with zinc stearate. This zinc stearate is a soap-like compound that makes this all work.
Zinc Stearates Role:
- Fills and Seals: It quickly builds up a thicker coating of the base resin and fills the pores in the wood.
- Easier Sanding: The powdery lubrication created by the zinc stearate reduces friction between the sandpaper and the wood surface. Sandpaper glides more smoothly across the wood surface, making it easier for you to sand a smoother surface.
- Reduces Clogging: Zinc stearate’s lubricant properties also reduce clogging/loading of the sandpaper with wood dust and coating debris.
Different Types of Sanding Sealer
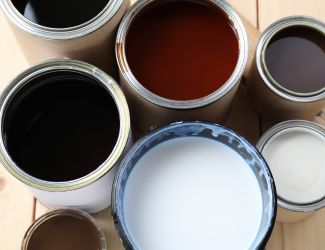
Oil-Based Sanding Sealers:
- Lacquer-Based: Made with a lacquer base, often nitrocellulose lacquer, which dries quickly and can be sanded easily.
- Polyurethane-Based: The polyurethane resin base provides excellent durability and water resistance once cured.
- Varnish-Based: Typically a blend of drying oils like linseed oil or tung oil, along with resins like alkyd or phenolic. Varnish sanding sealers provide good protection and a glossy finish.
Water-Based Sanding Sealers:
- Water-Based: Formulated with water-soluble resins, they dry quickly and can be used as a base for both water-based and oil-based finishes. Water-based sanding sealers also have less of an odor and lower in VOCs (volatile organic compounds), making them a more eco-friendly option.
Other Types:
- Shellac-Based: Shellac sanding sealers offer good adhesion and are compatible with a wide range of finishes. Fun fact, shellac is made by a resin secreted by the female lac bug.
When to Use Sanding Sealer
While sanding sealer isn't always necessary, it can be particularly beneficial for:
- Porous woods: As we’ve mentioned, sanding sealer’s main job is to effectively fill in wood pores. This makes sanding sealers a must-have for open-grained woods like oak, mahogany, and ash, where the pores are more visible
- Pre-staining: Applying sealer before staining is highly recommended to help prevent blotchiness so you get a more consistent color distribution.
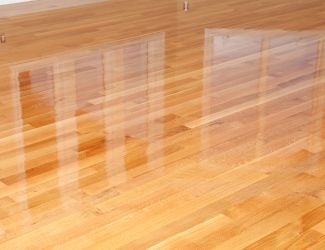
- High-gloss finishes: If you're aiming for a flawless (if you’re reading this, we’re sure you are), mirror-like finish, sanding sealer can help you smooth out the surface to hide any imperfections that would dull the finish.
- Wood furniture and cabinetry: Sanding sealer creates a uniform finish and protects wood furniture and cabinetry from stains, scratches, and moisture which are things that wood furniture and cabinetry are prone to.
- Hardwood floors: Sanding sealer enhances the appearance of hardwood floors, protects them from damage, and makes maintenance easier. Pair it with our premium floor sanding and refinishing products for a professional-grade finish that lasts.
- MDF/OSB painting: Like oak and mahogany, manufactured woods are often very porous. Sanding sealer is a great solution for achieving a smooth painted finish on these types of wood.
When NOT TO Use Sanding Sealer
You don’t always need to reach for a sanding sealer. There are some instances where you may opt to skip using it:
- Closed-Grain/Non-Porous Woods: Woods like maple and cherry naturally have very tight pores and have lower absorbencies. Sealing the wood sealer might not be necessary since these types of woods won’t benefit much from the pore-filling properties.
- Rustic or Distressed Look: If you’re looking for an intentionally rough surface or want to highlight the natural texture of the wood, sanding sealer might counteract your end goal.
- Over Existing Finishes: Sanding sealer is intended for raw, unfinished wood. Applying it over an existing finish can prevent proper adhesion.
- Quick Projects: If time is a major constraint for you and the final finish doesn’t require a high-quality aesthetic, you can skip the sealer to save time.
- Oil-Only Finishes: Certain oil finishes, linseed oil or tung oil, are designed to penetrate deep into the wood to enhance its natural beauty and provide protection. Applying a sanding sealer can prevent the oil from absorbing properly, diminishing the desired effects of the oil.
- Open-grain Woods with Exposed Finishes: For projects where you want to show off the natural grain pattern of open-pore woods like oak or ash, sanding sealer may fill in too much of the texture you're trying to showcase.
How to Apply Sanding Sealer
What You'll Need
- Sanding Sealer: Choose the appropriate type of sanding sealer based on the wood type and desired finish.
- Safety Gear: Wear protective gear such as safety goggles, a dust mask, and gloves
- Sandpaper: Fine-grit sandpaper (usually 220-320 grit)
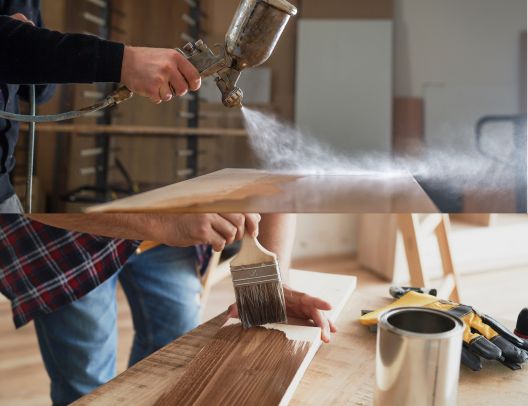
- Applicator: Use a high-quality brush, foam brush, or sprayer
- Tack Cloth: Have a clean tack cloth on hand wipe away any excess sealer and to buff the surface if necessary.
- Ventilation: Work in a well-ventilated area or use a respirator if needed.
- Stir Stick: You need to stir the sealer to give it a uniform consistency.
- Drop Cloth or Plastic Sheeting: Use a drop cloth or plastic sheeting under your work area to protect it from spills.
- Cleanup Supplies: Have mineral spirits or the appropriate solvent for cleaning your brushes or applicators after use.
- Optional: Sanding Block: A sanding block helps you sand larger surfaces evenly.
Preparation
1 - Sanding
The smoother the starting surface, the better your results. Assuming you’ve already sanded the surface to remove existing finishes, scratches, and imperfections, you can now prep the wood by sanding with a high grit sandpaper.
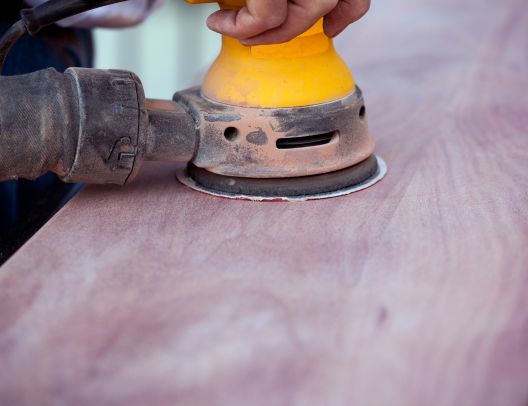
For larger surfaces, an orbital sander with a high-grit sanding disc with VAC holes or a 220-320 grit sanding belt on a portable belt sander can make the job a lot easier.
2 - Clean
Clean the surface thoroughly to remove all dust and debris using a vacuum if needed, finishing of with a tack cloth which is great for picking up fine particles.
Application
3 - Stir
Stir the sanding sealer thoroughly to evenly distribute the zinc stearate in the mixture.
4 - Apply First Coat
Apply a thin, even coat of sealer following the product instructions. Work in the direction of the wood grain.
5 - Allow Drying Time
Follow the manufacturer’s instructions and let the first coat dry completely. This time will vary depending on the base (water-based dries fastest) and among different manufacturers.
6 - Sand Between Coats
Once the first coat is fully dry, lightly sand the surface with fine-grit sandpaper to smooth out any raised grain or imperfections.
7 - Apply Additional Coats (If Needed):
One coat is usually enough, but some projects may benefit from a second. Repeat steps 3-5.
Final Sanding and Cleanup
8 - One Last Sanding Pass
After the final coat dries, do a very light final sanding with a fine grit (220 or higher).
9 - Cleanup
Vacuum or wipe away all dust thoroughly before moving onto your topcoat application.
Choosing the Best Sanding Sealer
For Staining: Consider a dewaxed sealer for better adhesion of the stain and to prevent color alteration.
For Painting: Water-based sealers are preferable under water-based paints for their quick drying and low VOC properties. On the other hand, oil-based sealers are better under oil-based paints for their durability and penetration.
Safety Precautions:
Safety first...even if it’s the last section of this guide. The following are safety precautions to take when working with sanding sealer:
- Ventilation: Always work in a well-ventilated area to avoid inhaling harmful fumes.
- Protective Gear: Wear nitrile or latex gloves, safety glasses, and a respirator to protect against chemical exposure and dust.
- Proper Handling and Disposal: Follow the manufacturer’s instructions for seal application and cleanup. Store sealers in a cool, dry place away from heat sources.
Still Have Questions
If you still have questions, our abrasives experts are here to help! You can reach out to us during office hours by phone, email, or online chat. If you contact us after hours, leave a message on voicemail or email, and we'll get back to you the next business day. While you're here, feel free to explore our vast range of abrasive products on our website. With a huge stock in our US-based warehouse, we able to get orders in the mail within one business day.
